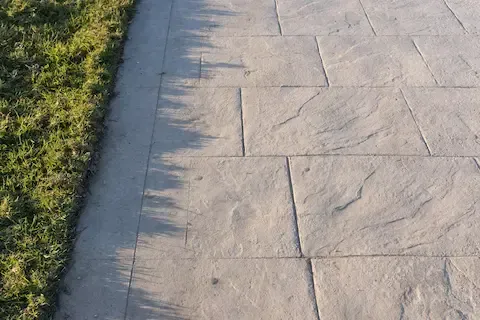
Resealing Stamped Patios After Gresham OR Wet Months
Resealing a stamped patio in Gresham after the wet season means waiting for a dry window, cleaning off winter debris, and applying the right sealer before summer foot traffic sets in. Gresham's wet winters leave behind algae, moisture trapped in the texture, and broken-down sealer that no longer protects color or pattern. The process is straightforward when you know the steps: clean thoroughly, let the surface dry completely, choose a compatible sealer, and apply it during a stable dry stretch. Most homeowners in the Gresham area can complete this in a single weekend.
Step 1: Wait for the Right Weather Window
Timing is the most important factor for sealer reapplication in the Pacific Northwest. Gresham typically sees consistent rain through March, with drier stretches beginning in April and becoming more reliable through May. You need at least 48 to 72 hours of dry weather before application and the same after. Surface temperature matters too — sealer applied below 50°F or above 90°F will not bond correctly. Check a multi-day forecast and aim for a window in late April or early May when Gresham's temperatures settle into the 55°F to 75°F range. Applying too early, while moisture is still trapped in the concrete from winter, leads to clouding and adhesion failure.
Step 2: Inspect the Existing Sealer Condition
Before cleaning, walk the patio and note where the sealer has failed. Common signs include white haziness, peeling or flaking film, dark patches where water is absorbing into the surface, and areas where color looks faded compared to the original. If you splash a small amount of water on the surface and it soaks in rather than beading, the sealer is gone in that spot. On stamped concrete, pay close attention to the grout lines and texture recesses — these areas trap moisture and break down first. A full reseal is typically needed every two to three years in Gresham given the rainfall volume the area receives.
Step 3: Clean the Surface Properly
Skipping or rushing the cleaning step is the most common reason resealing fails. Gresham patios accumulate moss, algae, leaf tannins, and dirt in the stamped texture over winter. Start with a stiff brush and a concrete-safe cleaner to scrub the surface. For moss or algae, use a diluted bleach solution or a purpose-made efflorescence remover, scrubbing into the texture recesses. Rinse thoroughly. A pressure washer set to 1,200 to 1,800 PSI works well for flushing the texture, but avoid concentrating the stream in one spot on older surfaces. After rinsing, let the concrete dry fully — in Gresham's spring humidity, this can take 24 to 48 hours longer than expected. Do not apply sealer to damp concrete under any circumstances.
Step 4: Strip Old Sealer If Peeling or Delaminating
If the existing sealer is flaking or coming up in sheets rather than just wearing thin, it needs to be stripped before you reseal. Applying new sealer over failing sealer traps moisture and creates adhesion problems that compound over time. Use a chemical sealer stripper rated for the type of sealer on your patio — solvent-based strippers for solvent-based sealers, water-based strippers for acrylic sealers. Scrub the stripper in, let it dwell, then pressure wash off the residue. For stamped concrete with deep texture, a second pass may be needed to clear the pattern recesses. Rinse until the water runs clear and then allow full drying time before moving to sealer selection.
Step 5: Choose the Right Sealer for Gresham's Climate
Not all sealers perform the same in wet climates. For Gresham stamped patios, penetrating sealers or high-quality acrylic film-forming sealers are the most common choices. Penetrating sealers soak into the concrete and repel moisture without changing the surface appearance — good for natural-look finishes. Acrylic sealers form a surface film that enhances color and adds a wet or satin sheen, which is popular on decorative stamped work. Avoid cheap acrylic blends that will peel within a season. For color retention and moisture resistance through another Gresham wet season, look for a product with UV resistance and a solids content of at least 25 to 30 percent. You can also review this stamped concrete comparison for product options specific to the Pacific Northwest.
Step 6: Apply the Sealer Correctly
Apply sealer in thin, even coats using a roller or pump sprayer. Thick application is one of the most common mistakes — it traps air bubbles in the film, leads to whitening, and reduces how long the sealer holds up. For most acrylic sealers, two thin coats applied four to six hours apart outperform one heavy coat. Work in sections so you don't trap yourself on the patio. On stamped surfaces, use a brush or smaller roller to work sealer into the texture and grout lines, then back-roll with the main roller. Apply the second coat perpendicular to the first for more even coverage. Do not apply in direct afternoon sun if temperatures are above 80°F — the sealer skins over before penetrating.
Step 7: Allow Full Cure Time Before Use
Most acrylic sealers are dry to the touch within one to two hours, but that is not the same as cured. Light foot traffic is usually safe after 24 hours in Gresham's spring temperatures. Furniture and heavy use should wait 48 to 72 hours. If rain moves in during cure, it can leave water marks in a fresh acrylic film — another reason to watch the forecast carefully before starting. Penetrating sealers cure faster and are less vulnerable to early rain contact, which makes them a practical choice for Gresham homeowners who cannot always control the weather window.
